Displaying List of Posts and Single Post on a Web page and Pagination - Django Blog #3
Hello Internet Programmer, today we display the list of posts and single post on a web page. So activate your virtual environment in your project directory path.
Creating post list view
Here we create a view for displaying the list of blog posts. Open views.py of your blog app and write the following code,
from django.shortcuts import render
from .models import Post

def post_list(request):
    posts = Post.objects.filter(status="published")
    return render(request,'post_list.html',{'posts':posts})
Here you created the post_list view. This view take request object as the parameter. This parameter is required by all views. In this view, you retrive all the posts with status="published" (only published post).
Finally, you use the render() shortcut provided by Django to render the list of posts with the given template. This function takes the request object, the template path, and the context variables to render the given template. It returns an HttpResponse object with the rendered text (normally HTML code). The render() shortcut takes the request context into account, so any variable set by the template context processors is accessible by the given template. Template context processors are just callables that set variables into the context.
Creating model managers
We use objects manager and filter in above code (in view.py). objects is the default manager of every model that retrieves all objects in the database.
However, you can also define custom managers for your models. You will create a custom manager to retrieve all posts with the published status.
There are two ways to add or customize managers for your models: you can add extra manager methods to an existing manager, or create a new manager by modifying the initial QuerySet that the manager returns.
The first method provides you with a QuerySet API such as Post.objects.my_manager(), and the latter provides you with Post.my_manager.all(). The manager will allow you to retrieve posts using Post.published.all().
Edit the models.py file of your blog application to add the custom manager,
# creating model manager
class PublishedManager(models.Manager):
    def get_queryset(self):
        return super(PublishedManager,self).get_queryset().filter(status='published')

class Post(models.Model):
    ...
    ...
    objects = models.Manager() # The default manager.
    published = PublishedManager() # Our custom manager.
models.py looks like this,
custom model manager
Let’s use our custom manager in views.py. Open views.py and make code look like following,
from django.shortcuts import render
from .models import Post

def post_list(request):
    posts = Post.published.all()
    return render(request,'post_list.html',{'posts':posts})
Now you can retrieve all post with the published status using published manager that we created.
Creating single post view
Let’s create our second view to display single post. Open views.py and add following function,
from django.shortcuts import render, get_object_or_404

def post_detail(request, post):
    post=get_object_or_404(Post,slug=post,status='published')
    return render(request, 'post_detail.html',{'post':post})
So this is the view for displaying single post. This view take post argument to retrieve a published post with the given slug.
In the detail view, you use the get_object_or_404() shortcut to retrieve the desired post. This function retrieves the object that matches the given parameters or an HTTP 404 (not found) exception if no object is found. Finally, you use the render() shortcut to render the retrieved post using a template.
Now your views.py looks like this,
Adding URL patterns for views
URL patterns allow you to map URLs to views. A URL pattern is composed of a string pattern, a view, and, optionally, a name that allows you to name the URL project-wide.
Django runs through each URL pattern and stops at the first one that matches the requested URL. Then, Django imports the view of the matching URL pattern and executes it, passing an instance of the HttpRequest class and the keyword or positional arguments.
Create a urls.py in blog application directory and add following code,
from django.urls import path
from . import views

app_name = 'blog'

urlpatterns=[
    path('',views.post_list,name="post_list"),
    path('<slug:post>/',views.post_detail,name="post_detail"),
]
In the above code, we define the an application namespace with app_name variable. This allows us to organize URLs by application and use the name when referring them.
Then we define two different patterns using the path() function. The first URL pattern does not take any argument and is mapped to the post_list view. The second URL pattern takes one argument and is mapped to the post_detail view.
You use angle brackets to capture the values from the URL. Any value specified in the URL pattern as <parameter> is captured as a string. You use path converters, such as <int:year>, to specifically match and return an integer and <slug:post> to specifically match a slug.
If using path() and converters aren’t sufficient for you, you can use re_path() instead to define complex URL patterns with Python regular expressions.
Next, you have to include the URL patterns of the blog application in the main URL patterns of the project.
Edit the urls.py file located in the awwblog directory of your project and make it
look like the following,
from django.contrib import admin
from django.urls import path, include

urlpatterns = [
    path('admin/', admin.site.urls),
    path('', include('blog.urls', namespace='blog')),
]
The new URL pattern defined with include refers to the URL patterns defined in the blog application so that they are included under the '' (home/index) path.
You include these patterns under the namespace blog. Namespaces have to be unique across your entire project. Later, you will refer to your blog URLs easily by using the namespace followed by a colon and the URL name, for example, blog:post_list and blog:post_detail.
Canonical URLs for models
A canonical URL is the preferred URL for a resource. You may have different pages in your site where you display posts, but there is a single URL that you use as the main URL for a blog post.
The convention in Django is to add a get_absolute_url() method to the model that returns the canonical URL for the object.
You can use the post_detail URL that you have defined in the preceding section to build the canonical URL for Post objects.
For this method, you will use the reverse() method, which allows you to build URLs by their name and pass optional parameters.
Open models.py file of blog application and add following code,
from django.urls import reverse

# post model
class Post(models.Model):
    ...
    ...
    def get_absolute_url(self):
        return reverse('blog:post_detail',args=[self.slug])
Now models.py look like this,
canonical url
We will use the get_absolute_url() method in your templates to link to specific posts.
Creating templates for your views
We created views and URL patterns for the blog application. URL patterns map URLs to views, and views decide which data gets returned to the user.
Templates define how the data is displayed; they are usually written in HTML in combination with the Django template language.
Let’s add templates to your application to display posts in a user-friendly manner.
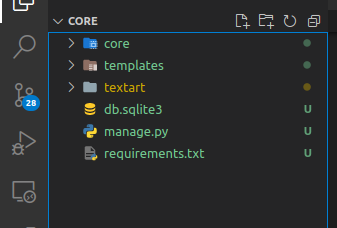
Now create templates directory in root directory. Project structure looks like this.
Open settings.py and then add “templates” in the TEMPLATES list like the below code,
Now make base.html file inside templates directory. The base.html file will include the main HTML structure of the website and divide the content into the main content area and a sidebar.
Django has a powerful template language that allows you to specify how data is displayed. It is based on template tags, template variables, and template filters,
- Template tags control the rendering of the template and look like
{% tag %} - Template variables get replaced with values when the template is rendered and look like
{{ variable }} - Template filters allow you to modify variables for display and look like
{{ variable |filter }}
Now open base.html and add following code,
{% load static %}

<!DOCTYPE html>
<html lang="en">
<head>
    <meta charset="UTF-8">
    <meta http-equiv="X-UA-Compatible" content="IE=edge">
    <meta name="viewport" content="width=device-width, initial-scale=1, maximum-scale=1, user-scalable=no">
    <title>AwwBlog{% block title %}{% endblock title %}</title>

    <!-- Bootstrap CSS -->
    <link href="https://cdn.jsdelivr.net/npm/[email protected]/dist/css/bootstrap.min.css" rel="stylesheet" integrity="sha384-eOJMYsd53ii+scO/bJGFsiCZc+5NDVN2yr8+0RDqr0Ql0h+rP48ckxlpbzKgwra6" crossorigin="anonymous">

    <!-- static file -->
    <link href="{% static "css/style.css" %}" rel="stylesheet">

</head>
<body>

  <nav class="navbar navbar-expand-lg navbar-light bg-light border-bottom">
    <div class="container">
      <a class="navbar-brand" href="/">AwwBlog</a>
      <button class="navbar-toggler" type="button" data-bs-toggle="collapse" data-bs-target="#navbarSupportedContent" aria-controls="navbarSupportedContent" aria-expanded="false" aria-label="Toggle navigation">
        <span class="navbar-toggler-icon"></span>
      </button>
      <div class="collapse navbar-collapse" id="navbarSupportedContent">
        <ul class="navbar-nav me-auto mb-2 mb-lg-0">
          <li class="nav-item">
            <a class="nav-link active" aria-current="page" href="#">Home</a>
          </li>
          <li class="nav-item">
            <a class="nav-link" href="#">Link1</a>
          </li>
          <li class="nav-item">
            <a class="nav-link" href="#">Link2</a>
          </li>
          <li class="nav-item">
            <a class="nav-link" href="#">Link2</a>
          </li>
        </ul>
        <form class="d-flex">
          <input class="form-control mr-0" type="search" placeholder="Search" aria-label="Search">
        </form>
      </div>
    </div>
  </nav>

    <main class="container my-3">
        {% block content %}

        {% endblock content %}
    </main>
  <!-- Option 1: Bootstrap Bundle with Popper -->
    <script src="https://cdn.jsdelivr.net/npm/[email protected]/dist/js/bootstrap.bundle.min.js" integrity="sha384-JEW9xMcG8R+pH31jmWH6WWP0WintQrMb4s7ZOdauHnUtxwoG2vI5DkLtS3qm9Ekf" crossorigin="anonymous"></script>

</body>
</html>
{% load static %} tells Django to load the static template tags that are provided by the django.contrib.staticfiles application, which is contained in the INSTALLED_APPS setting.
After loading them, you are able to use the {% static %} template tag throughout this template. With this template tag, you can include the static files, such as the css/style.css file, which you will find in the code of this example under the static/ directory in the root directory.
You can see that there are two {% block %} tags. These tell Django that you want to define a block in that area.
Templates that inherit from this template can fill in the blocks with content. You have defined a block called title and a block called content.
We also added bootstrap CDN for styling our blog. We added bootstrap navigation too.
Creating static file
Create static directory in root directory.

Now open settings.py and add following code at last.
STATIC_URL = '/static/'

#this code
STATICFILES_DIRS = [
    BASE_DIR / "static",
]
Now make css directory inside static directory and make style.css inside css directory and add following code.
.container{
    max-width: 768px;
    width: 100%;
}
Now create post_list.html (make sure the same name as we mention in views.py) in the templates directory and add the following code.
{% extends 'base.html' %}

{% block content %}
    {% for post in posts %}
    <div class="card mb-3">
        <div class="card-body">
            <div class="row g-0">
                <div class="col-md-5">
                    <div class="ratio ratio-16x9">
                        <img src="https://via.placeholder.com/1280x720" class="rounded" alt="{{post.title}}">
                    </div>
                </div>
                <div class="col-md-7 ps-md-3 pt-3 pt-md-0 d-flex flex-column">

                        <h2 class="card-title h5">
                                <a href="{{ post.get_absolute_url }}">
                                {{ post.title }}
                                </a>
                        </h2>

                        <div class="text-muted">
                            <small>
                                Published {{ post.publish.date }} by <strong>{{ post.author }}</strong>
                            </small>
                        </div>


                        <p class="card-text mb-auto py-2">{{ post.body|safe|striptags|truncatechars:100 }}</p>


                        <div>
                            <a href="{{ post.get_absolute_url }}" class="btn btn-primary btn-sm">Read more</a>
                        </div>

                </div>
            </div>
        </div>
    </div>

    {% endfor %}

{% endblock content %}
With the {% extends %} template tag, we tell Django to inherit from the base.html template. Then, we fill the title and content blocks of the base template with content. We iterate through the posts and display their title, date, author, and body, including a link in the title to the canonical URL of the post.
In the body of the post, you apply two template filters: truncatechars truncates the value to the number of characters specified, and linebreaks convert the output into HTML line breaks. You can concatenate as many template filters as you wish; each one will be applied to the output generated by the preceding one.
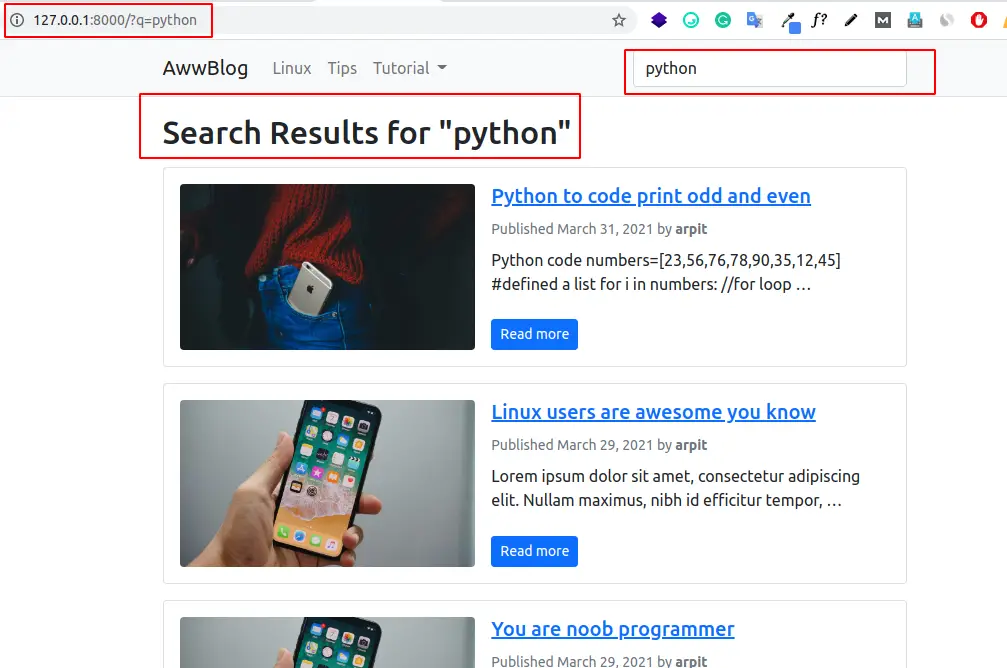
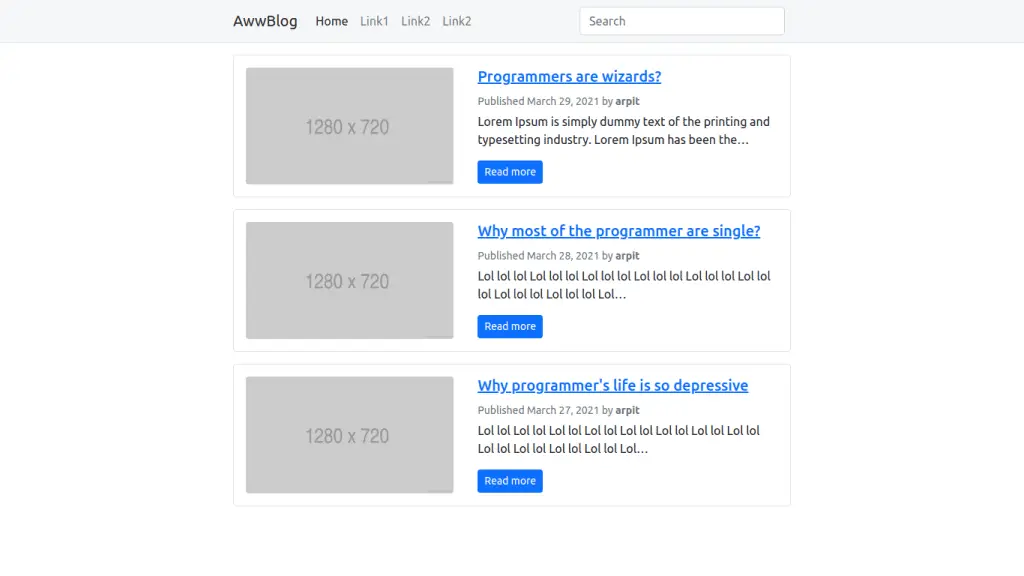
Open the shell and execute the python manage.py runserver command to start the development server. Open http://127.0.0.1:8000/ in the browser.
You can see the some post with status published. (I added some posts)
Now let’s make html file to display single post. Create post_detail.html file and add following code,
{% extends 'base.html' %}
{% block title %} - {{post.title}}{% endblock title %}
{% block content %}
<article>
<figure>
<img src="https://via.placeholder.com/1280x720" class="rounded" alt="{{post.title}}">
</figure>
<div class="mt-3">
<h1>{{post.title}}</h1>
<p class="text-muted">
Published {{ post.publish.date }} by <strong>{{ post.author }}</strong>
</p>
</div>
<div class="article-body">
{{post.body|linebreaks}}
</div>
</article>
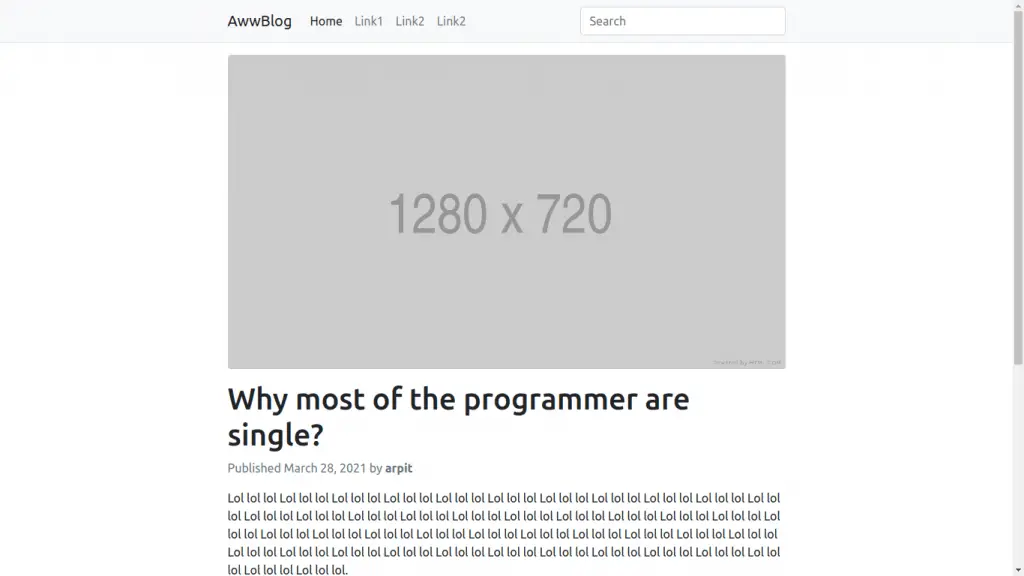
{% endblock content %}Next, you can return to your browser and click on one of the post titles to take a look at the detail view of the post. You should see something like this,
Adding pagination
When you start adding more blog posts, number of posts are loads in one page. Page loading become slow if you have thousands of posts.
Instead of displaying all the posts on a single page, you may want to split the list of posts across several pages. This can be achieved through pagination.
You can define the number of posts you want to be displayed per page and retrieve the posts that correspond to the page requested by the user. Django has a built-in pagination class that allows you to manage paginated data easily.
Open views.py of blog application to import the Django paginator classes and modify the post_list view, as follows
def post_list(request):
    posts = Post.published.all()

    paginator = Paginator(posts, 10) # 10 posts in each page
    page = request.GET.get('page')
    try:
        posts = paginator.page(page)
    except PageNotAnInteger:
        # If page is not an integer deliver the first page
        posts = paginator.page(1)
    except EmptyPage:
        # If page is out of range deliver last page of results
        posts = paginator.page(paginator.num_pages)

    return render(request,'post_list.html',{'posts':posts, page:'pages'})
Now post_list view in views.py looks like this,
views.py
This is how pagination works,
- You instantiate the
Paginatorclass with the number of objects that you want to display on each page. - You get the
page GETparameter, which indicates the current page number. - You obtain the objects for the desired page by calling the
page()method ofPaginator. - If the page parameter is not an integer, you retrieve the first page of results. If this parameter is a number higher than the last page of results, you retrieve the last page.
- You pass the page number and retrieved objects to the template.
Now you have to create a template to display the paginator so that it can be included in any template that uses pagination. In the templates/ folder, create a new file and name it pagination.html. Add the following HTML code to the file,
{% if page.has_other_pages %}
<ul class="pagination mt-3 mb-0">
{% if page.has_previous %}
<li class="page-item"><a class="page-link" href="?page={{ page.previous_page_number }}">«</a></li>
{% else %}
<li class="disabled page-item"><span class="page-link">«</span></li>
{% endif %}
{% for i in page.paginator.page_range %}
{% if page.number == i %}
<li class="active page-item"><span class="page-link">{{ i }}</span></li>
{% else %}
<li class="page-item"><a class="page-link" href="?page={{ i }}">{{ i }}</a></li>
{% endif %}
{% endfor %}
{% if page.has_next %}
<li class="page-item"><a class="page-link" href="?page={{ page.next_page_number }}">»</a></li>
{% else %}
<li class="disabled page-item"><span class="page-link">»</span></li>
{% endif %}
</ul>
{% endif %}The pagination template expects a Page object in order to render the previous and next links, and to display the current page and total pages of results.
Let’s return to the post_list.html template and include the pagination.html template at the bottom of the {% content %} block, as follows,
    {% include "pagination.html" with page=posts %}
{% endblock content %}
Since the Page object you are passing to the template is called posts, you include the pagination template in the post list template, passing the parameters to render it correctly. You can follow this method to reuse your pagination template in the paginated views of different models.
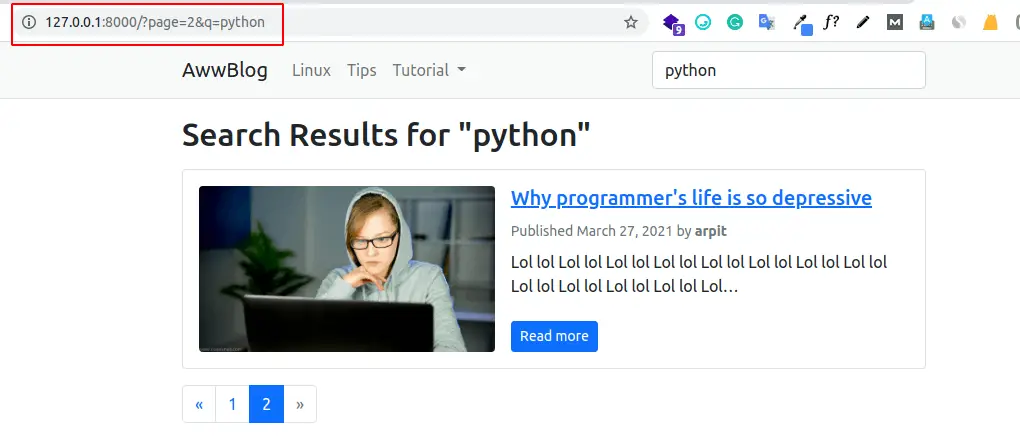
Now open http://127.0.0.1:8000/ in your browser. You should see the pagination at the bottom of the post list and should be able to navigate through pages,
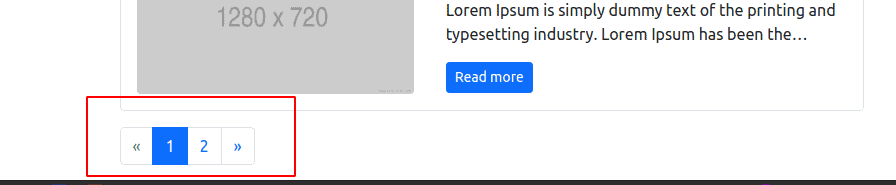
Pagination
That’s it for this tutorial. Share this with your friends and stay awesome.
GitHub Link: https://github.com/SoniArpit/awwblog
Previous: Designing the blog data schema – Django Blog #2
Next: Integrating CKEditor in Django Admin and Rendering HTML in a template – Django Blog #4