Adding a Sitemap to the Website - Django Blog #10
Hello Internet People, today we add a sitemap to the website. A sitemap is an XML file that tells search engines the pages of your website, their relevance, and how frequently they are updated. Using a sitemap will make your site more visible in search engine rankings: sitemaps help crawlers to index your website’s content.
Django comes with a sitemap framework, which allows you to generate sitemaps for your site dynamically.
The Django sitemap framework depends on django.contrib.sites, which allows you to associate objects to particular websites that are running with your project.
This comes in handy when you want to run multiple sites using a single Django project. To install the sitemap framework, you will need to activate both the sites and the sitemap applications in your project.
Edit the settings.py file of your project and add django.contrib.sites and django.contrib.sitemaps to the INSTALLED_APPS setting. Also, define a new setting for the site ID, as follows,
SITE_ID = 1

# Application definition

INSTALLED_APPS = [
    'django.contrib.admin',
    'django.contrib.auth',
    'django.contrib.contenttypes',
    'django.contrib.sessions',
    'django.contrib.messages',
    'django.contrib.staticfiles',
    'blog',
    'ckeditor',
    'ckeditor_uploader',
    'taggit',
    'django.contrib.sites',
    'django.contrib.sitemaps',
]
Now run the following command to create the tables of the Django site application in the database,
python3 manage.py migrate
The sites application is now synced with the database.
Next, create a sitemaps.py file inside your blog application directory and add the following code,
from django.contrib.sitemaps import Sitemap
from .models import Post

class PostSitemap(Sitemap):
    changefreq = 'daily' # 'always', 'hourly', 'daily', 'weekly', 'monthly', 'yearly', 'never'
    priority = 0.9

    def items(self):
        return Post.published.all()
    def lastmod(self, obj):
        return obj.updated
We create a custom sitemap by inheriting the Sitemap class of the sitemaps module.
The changefreq and priority attributes indicate the change frequency of your post pages and their relevance in your website (the maximum value is 1 ).
The items() method returns the QuerySet of objects to include in this sitemap. By default, Django calls the get_absolute_url() method on each object to retrieve its URL.
If you want to specify the URL for each object, you can add a location method to your sitemap class.
The lastmod method receives each object returned by items() and returns the last time the object was modified.
Both the changefreq and priority attributes can be either methods or attributes.
Finally, you just need to add your sitemap URL. Edit the main urls.py file of awwblog project and add the sitemap, as follows,
from django.contrib.sitemaps.views import sitemap #this
from blog.sitemaps import PostSitemap #this

#this
sitemaps = {
    'posts': PostSitemap,
}

urlpatterns = [
    path('admin/', admin.site.urls),
    path('', include('blog.urls', namespace='blog')),
    path('ckeditor/',include('ckeditor_uploader.urls')),
    path('sitemap.xml', sitemap, {'sitemaps': sitemaps},name='django.contrib.sitemaps.views.sitemap'), #this
]+static(settings.MEDIA_URL, document_root=settings.MEDIA_ROOT)
In the above code, we include the required imports and define a dictionary of sitemaps. We define a URL pattern that matches sitemap.xml and uses the sitemap view. The sitemaps dictionary is passed to the sitemap view.
Now run the development server and open http://127.0.0.1:8000/sitemap.xml in your browser. You will see the following XML output,
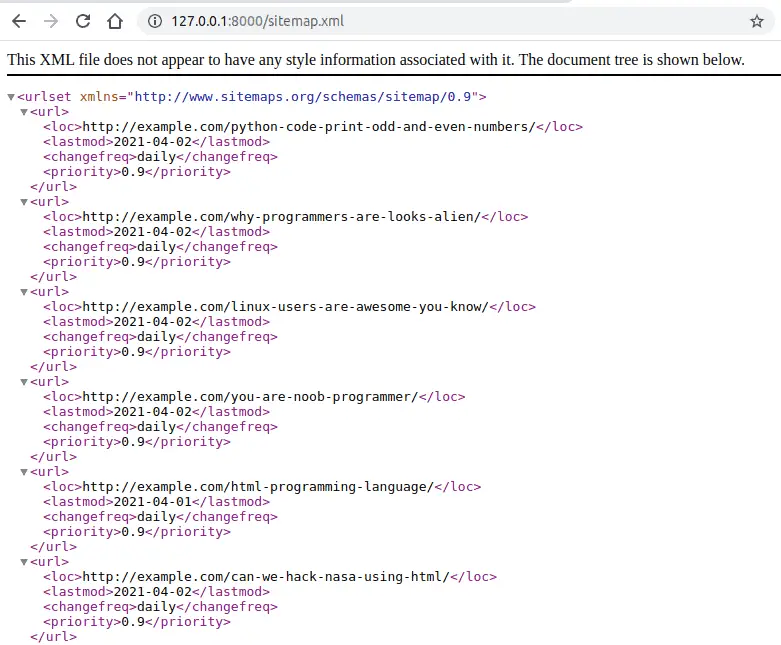
sitemap
The URL for each post has been built calling its get_absolute_url() method.
The lastmod attribute corresponds to the post updated date field, as you specified in your sitemap, and the changefreq and priority attributes are also taken from the PostSitemap class.
You can see that the domain used to build the URLs is example.com. This domain comes from a Site object stored in the database. This default object was created when you synced the site’s framework with your database.
Open http://127.0.0.1:8000/admin/sites/site/ in your browser. You should see something like this,
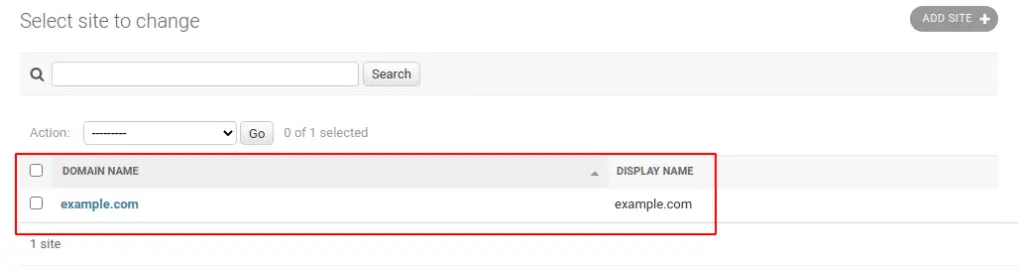
django site
The preceding screenshot contains the list display administration view for the site’s framework.
Here, you can set the domain or host to be used by the site’s framework and the applications that depend on it.
In order to generate URLs that exist in your local environment, change the domain name to 127.0.0.1:8000, as shown in the following screenshot, and save it,

add domain
The URLs displayed in your feed will now be built using this hostname. In a production environment, you will have to use your own domain name for the site’s framework.
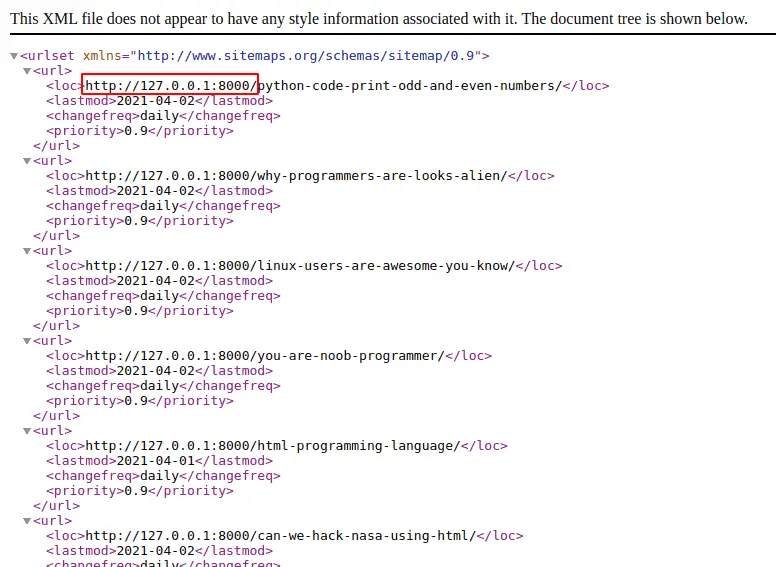
domain changed
That’s it for this tutorial. This one was last. Share this with your friends and stay awesome.
GitHub Link: https://github.com/SoniArpit/awwblog